What is Clonezilla?
Clonezilla is a partition and disk imaging/cloning program similar to True Image® or Norton Ghost®. It helps you to do system deployment, bare metal backup and recovery. Two types of Clonezilla are available, Clonezilla live and Clonezilla SE (server edition). Clonezilla live is suitable for single machine backup and restore. While Clonezilla SE is for massive deployment, it can clone many (40 plus!) computers simultaneously. Clonezilla saves and restores only used blocks in the hard disk. This increases the clone efficiency. With some high-end hardware in a 42-node cluster, a multicast restoring at rate 8 GB/min was reported.
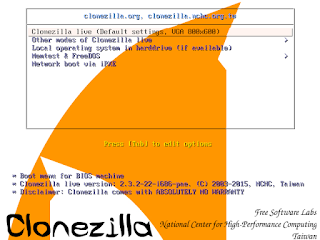 |
| Select "Clonezilla Live Default" when booting |
Features:
- Many File systems are supported: (1) ext2, ext3, ext4, reiserfs, reiser4, xfs, jfs, btrfs, f2fs and nilfs2 of GNU/Linux, (2) FAT12, FAT16, FAT32, NTFS of MS Windows, (3) HFS+ of Mac OS, (4) UFS of FreeBSD, NetBSD, and OpenBSD, (5) minix of Minix, and (6) VMFS3 and VMFS5 of VMWare ESX. Therefore you can clone GNU/Linux, MS windows, Intel-based Mac OS, FreeBSD, NetBSD, OpenBSD, Minix, VMWare ESX and Chrome OS/Chromium OS, no matter it's 32-bit (x86) or 64-bit (x86-64) OS. For these file systems, only used blocks in partition are saved and restored by Partclone. For unsupported file system, sector-to-sector copy is done by dd in Clonezilla.
- LVM2 (LVM version 1 is not) under GNU/Linux is supported.
- Boot loader, including grub (version 1 and version 2) and syslinux, could be reinstalled.
- Both MBR and GPT partition formats of hard drive are supported. Clonezilla live also can be booted on a BIOS or uEFI machine.
- Unattended mode is supported. Almost all steps can be done via commands and options. You can also use a lot of boot parameters to customize your own imaging and cloning.
- One image restoring to multiple local devices is supported.
- Image could be encrypted. This is done with ecryptfs, a POSIX-compliant enterprise cryptographic stacked filesystem.
- Multicast is supported in Clonezilla SE, which is suitable for massive clone. You can also remotely use it to save or restore a bunch of computers if PXE and Wake-on-LAN are supported in your clients.
- The image file can be on local disk, ssh server, samba server, NFS server or WebDAV server.
- AES-256 encryption could be used to secures data access, storage and transfer.
- Based on Partclone (default), Partimage (optional), ntfsclone (optional), or dd to image or clone a partition. However, Clonezilla, containing some other programs, can save and restore not only partitions, but also a whole disk.
- By using another free software drbl-winroll, which is also developed by us, the hostname, group, and SID of cloned MS windows machine can be automatically changed.
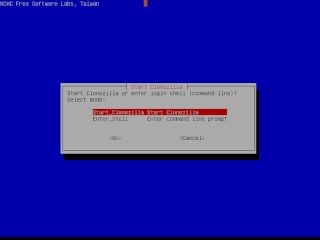 |
| Select "Start Clonezilla" |
Minimum System Requirements for Clonezilla live:
- X86 or x86-64 processor
- 196 MB of system memory (RAM)
- Boot device, e.g. CD/DVD Drive, USB port, PXE, or hard drive
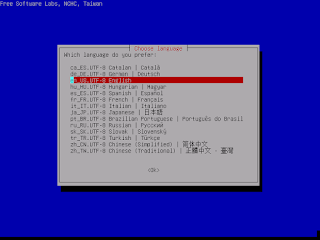 |
| Select Language "English" |
Limitations:
- The destination partition must be equal or larger than the source one.
- Differential/incremental backup is not implemented yet.
- Online imaging/cloning is not implemented yet. The partition to be imaged or cloned has to be unmounted.
- Due to the image format limitation, the image can not be explored or mounted. You can _NOT_ recovery single file from the image. However, you still have workaround to make it, read this.
- Recovery Clonezilla live with multiple CDs or DVDs is not implemented yet. Now all the files have to be in one CD or DVD if you choose to create the recovery iso file.
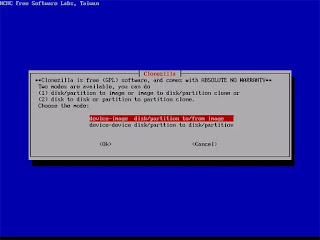 |
| Select "Device - Device" |
How to Use:
- Select "Clonezilla Live Default" when booting
- Select "Start Clonezilla".
- Select Language "English"
- Select "Device - Device"
- Select keymap from "Arch list - (if ps2 keyboard) " or "Full List - (if your using usb keyboard) "
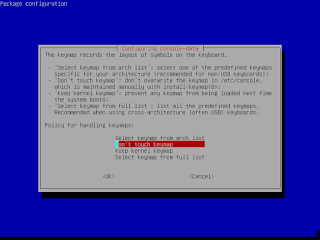 |
| Select keymap from "Arch list" or "Full List" |
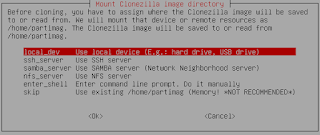
- Select the destination location. This is where you are going to save your image to. For this tutorial, we are going to be choosing the first option “local_dev“. However, if you do not have a USB drive available, notice that you can also save the image to a wide variety of shared drives on your network.
- Select the Source drive. This is the drive you are which is connected to SATA1 = sda1
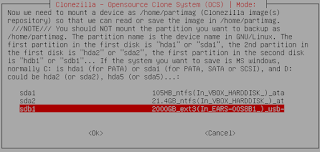
- Select the Source drive. This is the drive you are which is connected to SATA2 =sda2
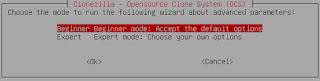
- To shorten the steps needed to finish, choose “Beginner“. If you have limited space on your destination drive and want to choose a more suitable compression method, other than the default chosen by Clonezilla, choose “Expert”. Expert mode also lets you modify other settings which are useful whenever you have trouble during the cloning process.
- Select if the source file system need to be checked or not:Select if the source file system need to be checked or not:
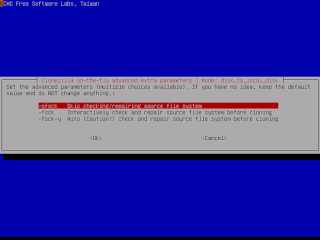 |
| Select "Auto" for Reliable Secure Process |
- Select the mode you want after the disk cloning is done:
 |
| Select the first choice "choose" |
- Clonezilla shows you the complete command to run this disk to disk clone action:
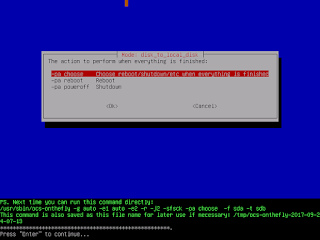 |
| Click "Enter" |
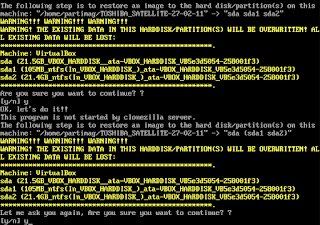 |
| Click "y" for yes to all |
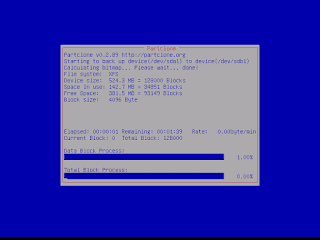 |
| Done.... Great Job! |
Get It Here for AMD 64 Version
Get It Here for Intel 86 Version


Comments
Post a Comment
What do you think?